
Ruffled Skirt Photo Tutorial
Hopefully I can add one tutorial or pattern each month! *BONUS* There are 2 different skirts here!
*Please note that this tutorial makes a newborn size skirt, but I give directions for custom fitting*
Supplies:
Fabric
Sewing machine
Lace (if you so wish)
coordinating thread
Elastic, non roll is best
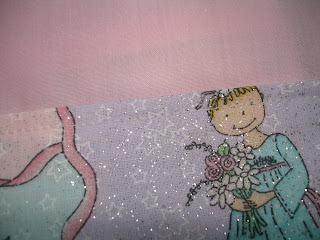
To make a newborn sized skirt you will need to cut your skirt bodice(ie, the ballerina fabric in the picture)
23 wide by 10" tall if you have a pattern on your fabric that goes in a specific direction, make sure you're cutting your fabric in the correct position.
Waistband: 23" w x 4"h
Ruffles: Cut as many as you wish, but 2 was enough since I wanted the top fabric to show.
cut each ruffle band 44"w x 4"h
1" wide elastic

This things first!
You are going to need to overcast or serge the edges of your fabrics. Now don't get scared, run away and assume you can't do this if you don't have the ability to do this. Most basic sewing machines come with at least one piece that will alllow you to do this! Believe it or not! In the picture above, the piece on the left is a basic machine foot for my sewing machine. I use this one for everything basic. The one in the middle is also overcasting or "finishing" edges of fabric similar to how a serger would do it. (This one is actually broken, there should be a little piece in the middle (big hole) sticking up dividing that hole into 2, but I wasn't careful and forgot to change the setting on my machine and the needle broke it off! Lesson learned...)The piece on the right I believe is for faggoting (joining two pieces of fabric together, I believe) but it's working for my make shift overcasting. *IF* you do have these pieces great!!!! here is the stitch that you need to use for that. See picture, #6 is what I use.

Alright! Let's get started, Now I always wash, dry and iron my fabrics before sewing. I don't like goof ups so I don't want any fabric shifting after the first wash due to shrinkage if I don't prewash.
So, assuming you have it all prewashed, dried and ironed, you need to start with the fabric that will be the skirt bodice. (Ballerina in the picture)
Cut out all fabric pieces indicated above and serge all edges. (These were done on a regular sewing machine with the foot attachment pictured above!)
*******Additional Sizes********
If you want to make bigger sizes the best thing to do it to measure your little person. You'll want to measure the waist. Or if that person isn't available you can measure a skirt or shorts that fit well and go from there. Add at least 5" to the width of the bodice and wasitband and an additional 8-10" of width to the ruffles.
(On the other skirt I will share the tutorial for, the width was 42" and that would definatly fit a 3-8 yr old. Actually, I think *I* can fit in it, but um, it'd be kinda short. lol)
So, after you serge or overcast all the edges.
With the print side/RS of the fabric of the skirt bodice facing up, lay your skirt wasitband down along the top edge of the bodice. Match up the short sides. If the waistband has a print side to it or a Right Side then you have to lay the print sides together or Right Sides Together. Pin in place. (I took this picture before ironing and overcasting...)
Next you'll need to sew along the top edge to attach the wasitband to the skirt. I sew two times really close together for extra strength as I know kids are tough on clothing!

Then you need to fold down the little flap that will be sticking up towards the skirt bodice fabric. And stitch down ontop of it.
You will end up with this. Can you see the stitching?
Time to make ruffles!!!!!
Take one piece of your ruffles fabric and fold in half shortways. Sew with the longest stitch setting you have along the serged/overcast edge. Do not tie off thread. Instead you'll need to loosen up the last stitch and pull it through the fabric as if you're going to undo the stitching. Only take one stitch out though. Then you'll need to pull on ONE thread and gently tug, sliding the fabric away from the direction you're pulling in.
Keep doing this, gently gathering up all the fabric. Usually I get it about halfway and then do the same on the other end of the fabric. After it's all cinched up together I lay it down ontop of the skirt bodice and see how it looks. If it's too short I will gently undo the ruffles by sliding them towards the end of the thread. You can arrange the ruffles however you wish at this point. Some people like them evenly spaced or varied. here I just 'went for it' and left it just enough to match up to the sides of the skirt bodice.

Ruffle!
Once you lay out the ruffle and match up the sides to the bodice, pin it in place. Then repeat with the other ruffles, slightly overlapping the top edge seam so it won't show after you stitch it down. Once you have them where you want them, Stitch them down. Go slow and remove all the pins! Sometimes they can hide under the ruffles!
You can now place your lace over the top edge of the ruffle that's on the top. It will hide all the stitching! :) Sew this down in place, going slowly as well, lace is delicate under a machine!
Next you'll want to sew up the very bottom of the bodice. This is the bottom edge. Just turn it over, fold it under, then again to hide the raw edges and sew it down in place.
Top Wasitband:
Flip it over so you're looking at the back. Fold the top edge down just overtop of the stitching where you attached it to the bodice. You want to fold the top over twice like you did with the bottom so you're encasing the raw edge. Sew this down.
You're also done! you just need to fold the whole thing in half so it will form a skirt, matching the short sides up, right sides (print sides) together. Sew from the bottom up. When you get to the bottom of the wasitband, stop. You'll want to insert the elastic with a safety pin attached to the end for ease of threading and then pull it out the other side. Sew the two elastic ends together and sew up the wasitband seam!
TADA!


