Showing posts with label easy tutorial. Show all posts

Monday, April 16, 2012

5 Ply Training Pants Conversion to side snapping pants


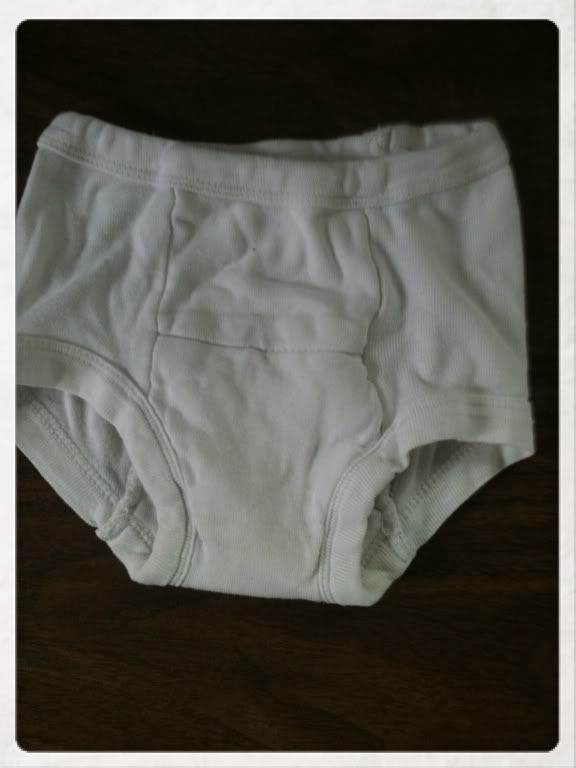
This tutorial will show you how to convert 5 ply training pants to side snapping training pants. These are way easier to take off during #2 accidents rather than sliding the mess down the childs leg while standing in the bathroom. Not to mention when you're out and about in public and don't want the child to sit on the floor in the bathroom they can stand while you snap them onto them. They are especially good so you don't have to take shoes, socksand pants off on those gross floors!!

As far as I know, I came up with this idea, so if you share it, please link back to me. Give me a little credit to spending 2 days fighting with a broken computer to put this tutorial together!
Video coming soon!


Supplies:

Snap pliers and snaps, among other goodies, can be found here.... www.kamsnap.com don't say i didn't worn you but snaps are addictive... and if you look around their site you'll find cute engraved ones with animals!

You need the snaps and the pliers (you need 12 snap sets per pants)

Sharp Scissors

Jersey Knit or Stretch Knit fabric, or old t-shirts if you're into repurposing and don't know how to go about getting ahold of such fabric. (You can usually find someone that knows what their talking about at the right fabric store, but not everone has such luck.)


First things first. I recommend washing the pants and fabric a few times to help shrink them up so the snaps don't shift afterwards.


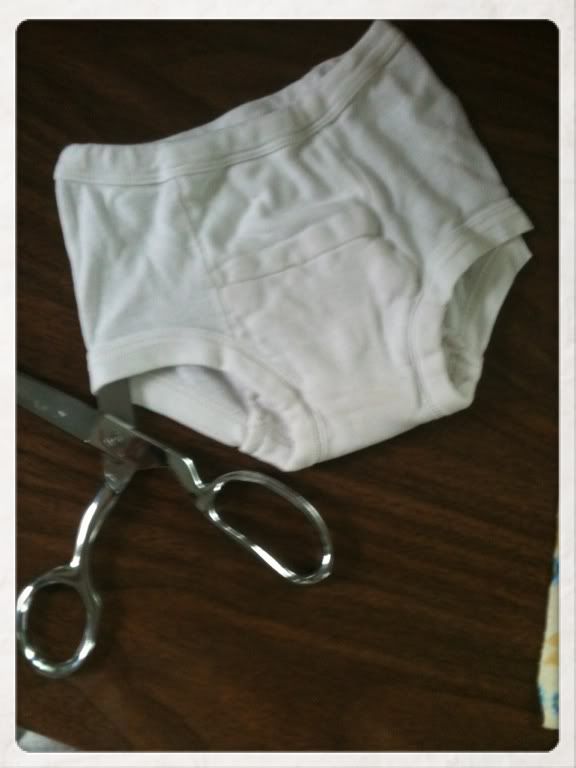
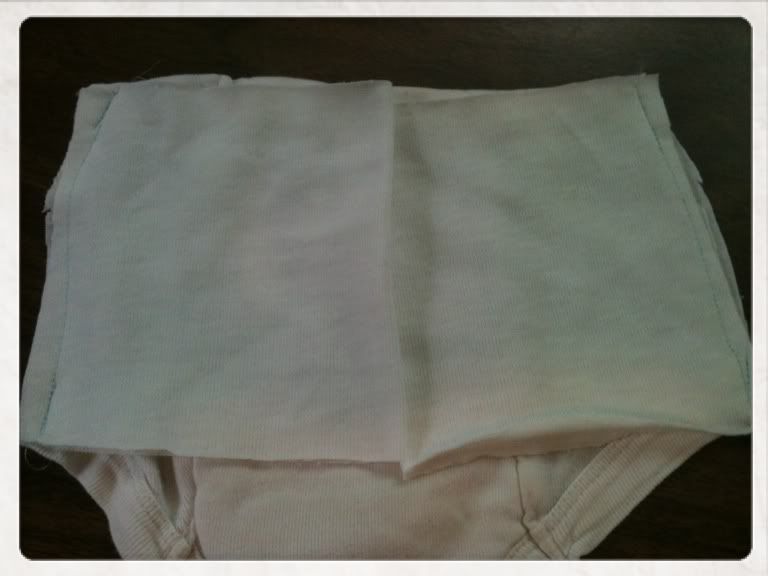
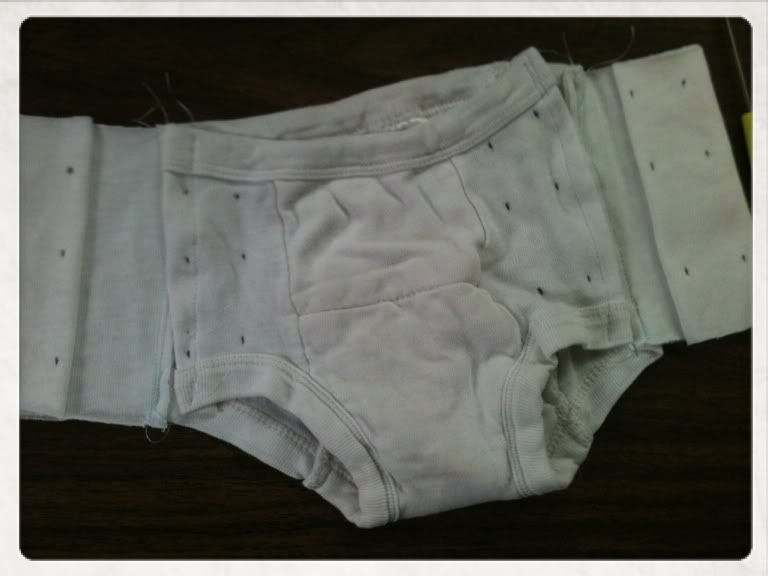
First, slip your scissors into the side of the training pants as shown. There is no seam here so just cut straight up to the top of both sides of all of the pants you want to convert.


And it would figure that I'd cut a small hole in the middle of the fabric during a tutorial! LOL, SO ignore that, I will work around it and you may not even notice when I fix it.

So now you get out your jersey knit fabric or stretch knit, or old t-shirt and lay it out flat.

I am using a size 2 pants for this tutorial and I did not "finish" the top and bottom edges of the fabric on this pair because sometimes they don't stretch as much and that would be getting into a ton of sewing and I wanted this to be easy. Please comment below if you want to do want to know how to do it.


Make sure you have the "grain" of the fabric going the right way. You want the most stretch of the fabric to be going horizontally or width wise with how you cut it.


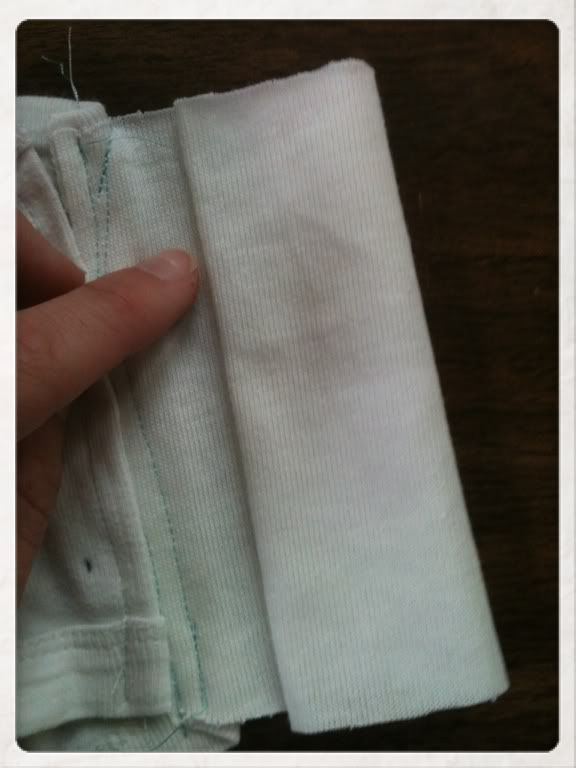
I cut out 2 strips of fabric 8" wide by 4" long. The edges will roll to the right side but this is ok. Just press them open with your hands or fingers or pin them after you fold the fabric together (in the next step.)


Next, fold the fabric with the wrong sides together. You may have to flip the fabric over at this point and then fold it widthwise so that it's now 4" wide.


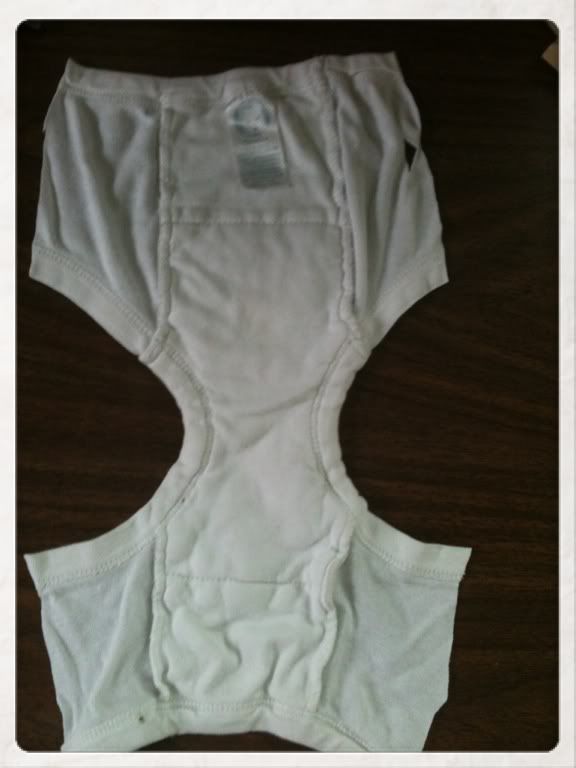
Next, fold the opened up pants over so the tag is on the bottom (this is the inside)
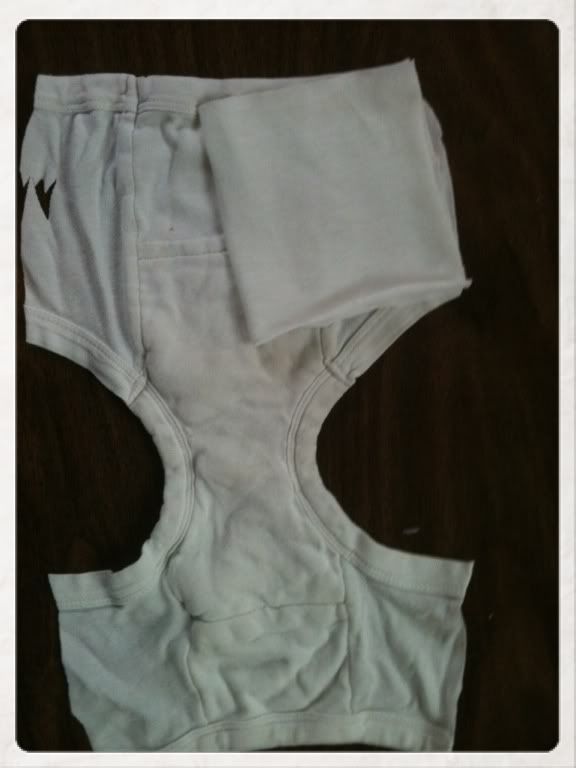
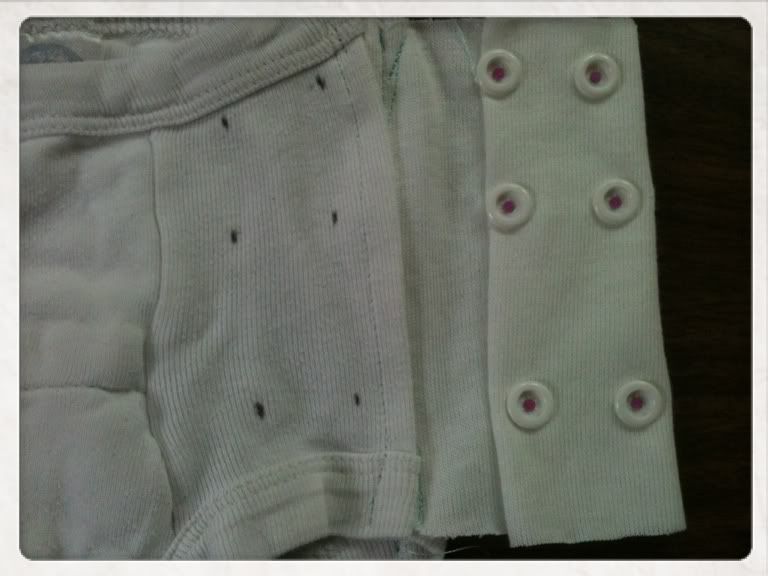
Place one folded "panel" and line up the open edges with the edges of the cut pants.
Pin in place.

***Please note you need to attach these pieces to the "back" sides of the pants. The same end that the tag is on, but on the right side of the fabric.
Repeat for the other side and sew down in place. Use about a 1/2" seam allowance or less. More if the pants originally fit too big.

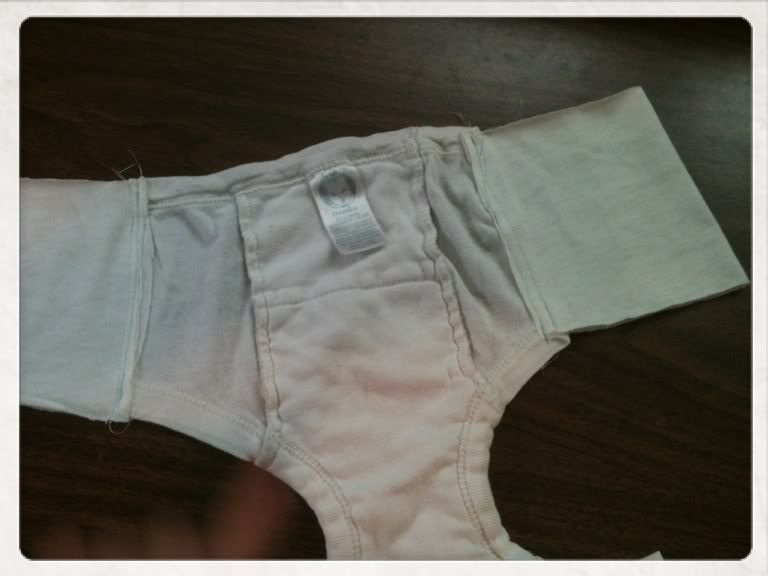
Here they are opened up.

(See how they are on the same end of the tag?)


Next you need to hem the other "front" end of the pants. I only turn it under once since this fabric doesn't fray. Sew down on both sides. (Left and right)

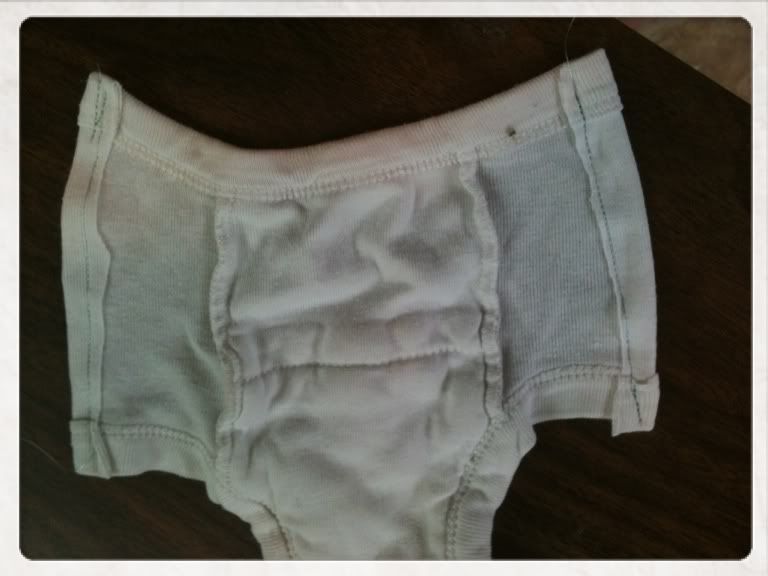
Not sure why it looks uneven, but it doesn't matter too much.

The sewing part is done! Simple right?

Now this is the FUN part! The snaps!

(*Please note that I'm using smaller cap sizes than the studs and sockets in case they look smaller, they are.) You can use all the same size snaps for simplicity.

                                                                Ready for snaps!


Bead organizers help with keeping the snaps organized! I then have another little tray holder for those other two trays on the left that hold all the overflow and the pliers and pieces.

Time to mark where the snaps will go. Now since I'm not too picky I used a pen to make dots. You could use a pencil if you are worried you put them in the wrong spot and want them gone later.

(Snap placement: I put 2 dots 1" apart in 3 rows. I just 'winged' it and made sure they were straight and evenly spaced. I wanted the ones closest to the sides to be somewhat close to the sides. so I started there and worked inward. Start by the front panel and mark your snap placements.

When you're ready for the tabs (the part you sewn on) you need to fold the edge over (so it's on top)about an inch. You need to put your snap marks on this tab. After you fold this over, it will be right next to your other marks so you'll be able to line them up real good.
Repeat for other side.

Snap placement marks.

Ready for snaps!

So if you don't know how to use the pliers, you need to put the snap cap (the part with the pointy stick thing) through the fabric and put the socket or stud) on the other side of the fabric and line up the pliers under the CAP and then press. Making sure everything is lined up evenly. I couldn't get pictures of this part since it takes two hands, but if you NEED me to, I can probably get a video of this. There are also directions on the package.

If you've not practiced already, out of excitement, like I do, get some scrap fabric and practice putting a few snaps on.
I also used two different colored snap parts. The white part is the female part or the socket. This part is on the tab we sewn on and it's on the inside. The other part of the snap, the cap, is on the outside.


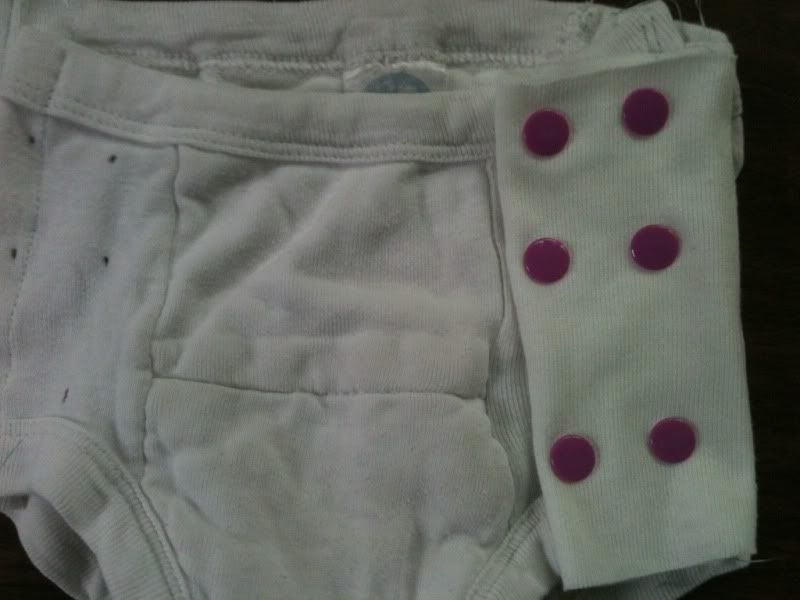
Once you do all the ones on the front it should look like this!

The purple part of the snap will be on the inside (and will be fine against your little ones skin!)


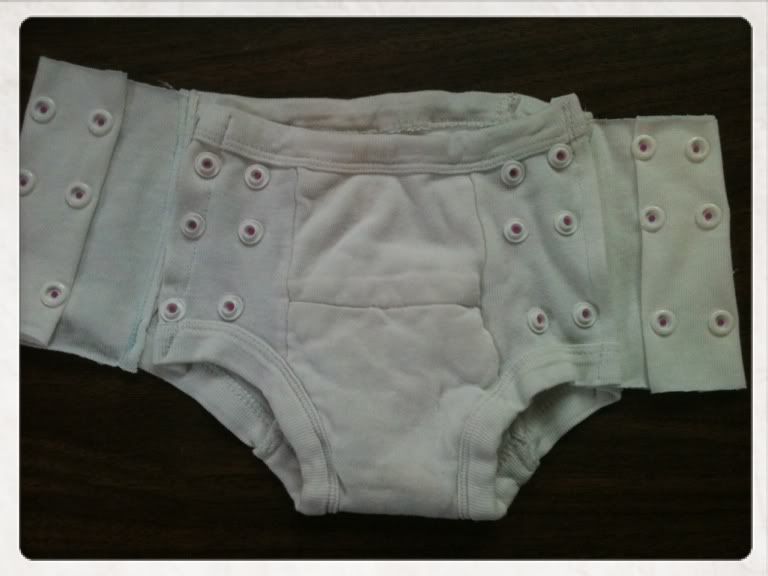
Last you just need to put the other ones on making sure to go through all the layers of fabric, including the part that we folded over from earlier.

Make sure that the snaps get put on the opposite side this time so when you fold the tab over the snap parts meet together and snap together in the right way. You can easily test this before putting the snaps on by just folding over the tab and looking to see where the cap snap will go. (For this side, the caps will be shown, on the outside of the pants.)

Finish these up and YOU'RE DONE!!
Yey! You're done!
Test each snap set to make sure they all got pressed together correctly. They should "snap" closed and opened.

If they didn't I can direct you to a tutorial to get them replaced.


***Look like too much work and just want someone to do it for you? I will gladly convert your training pants for you!*** You can contact me via Facebook at www.facebook.com/SweetnSimpleDesigns or you can email me at SweetLilRachy00@netscape.net

Sunday, August 28, 2011

5 Minute Recycled T Shirt

Here is a simple 2 step, 5 minute t shirt that you can "make" to reuse baby onesies.

My babies no longer use the onesies. Mainly because we cloth diaper and they're a pain and their diaper covers are way too cute to cover up!

Supplies are basic.

Sewing machine
Scissors
Onesie

Thread your sewing machine in the color you'd like to use. Here I used purple and a pink onesie. This was to coordinate with one of my daugthers diaper skirts.


                                                              Cut off just above the leg holes.

TA DA! It's a shirt. Now you can leave it like this if you want. It won't fray and will still be somewhat stylish since this is the new "look". You can just simply sew a running stitch along this edge if you wish, using a rather long stitch and do not stretch the fabric as you sew.

OR

                                                               You can add ruffles.

Just simply put the shirt under the machine and put the needle down. Here I used an overcast stitch since i have the option on my machine. (See previous post if you don't know if you do!) With the needle down through the shirt, pull on the fabric infront of the machine just enough to stretch it almost all the way. You don't want to pull it completely because then it won't move under the needle as your sewing and it will stay in one spot. You have to keep it stretched as your sewing so that it will ruffle up. :)


You can also do this with the arm holes if they aren't hemmed. It all depends on the brand shirts you buy.

Now is a great time of year to buy these second hand because they are "short sleeve" and considered summer stuff.

You can add appliques and/or tye dye them if they have stains!

Ruffles with tulle around the bottom is cute too!

Monday, August 8, 2011

Ruffled Skirt Photo Tutorial

                                Ruffled Skirt Photo Tutorial

Hopefully I can add one tutorial or pattern each month! *BONUS* There are 2 different skirts here!
*Please note that this tutorial makes a newborn size skirt, but I give directions for custom fitting*
Supplies:
Fabric
Sewing machine
Lace (if you so wish)
coordinating thread
Elastic, non roll is best

To make a newborn sized skirt you will need to cut your skirt bodice(ie, the ballerina fabric in the picture)
23 wide by 10" tall if you have a pattern on your fabric that goes in a specific direction, make sure you're cutting your fabric in the correct position.
Waistband: 23" w x 4"h
Ruffles: Cut as many as you wish, but 2 was enough since I wanted the top fabric to show.
            cut each ruffle band 44"w x 4"h

1" wide elastic


This things first!

You are going to need to overcast or serge the edges of your fabrics. Now don't get scared, run away and assume you can't do this if you don't have the ability to do this. Most basic sewing machines come with at least one piece that will alllow you to do this! Believe it or not! In the picture above, the piece on the left is a basic machine foot for my sewing machine. I use this one for everything basic. The one in the middle is also overcasting or "finishing" edges of fabric similar to how a serger would do it. (This one is actually broken, there should be a little piece in the middle (big hole) sticking up dividing that hole into 2, but I wasn't careful and forgot to change the setting on my machine and the needle broke it off! Lesson learned...)The piece on the right I believe is for faggoting (joining two pieces of fabric together, I believe) but it's working for my make shift overcasting. *IF* you do have these pieces great!!!! here is the stitch that you need to use for that. See picture, #6 is what I use.


Alright! Let's get started, Now I always wash, dry and iron my fabrics before sewing. I don't like goof ups so I don't want any fabric shifting after the first wash due to shrinkage if I don't prewash.

So, assuming you have it all prewashed, dried and ironed, you need to start with the fabric that will be the skirt bodice. (Ballerina in the picture)


Cut out all fabric pieces indicated above and serge all edges. (These were done on a regular sewing machine with the foot attachment pictured above!)


*******Additional Sizes********
If you want to make bigger sizes the best thing to do it to measure your little person. You'll want to measure the waist. Or if that person isn't available you can measure a skirt or shorts that fit well and go from there. Add at least 5" to the width of the bodice and wasitband and an additional 8-10" of width to the ruffles.

(On the other skirt I will share the tutorial for, the width was 42" and that would definatly fit a 3-8 yr old. Actually, I think *I* can fit in it, but um, it'd be kinda short. lol)

So, after you serge or overcast all the edges.

With the print side/RS of the fabric of the skirt bodice facing up, lay your skirt wasitband down along the top edge of the bodice. Match up the short sides. If the waistband has a print side to it or a Right Side then you have to lay the print sides together or Right Sides Together. Pin in place.  (I took this picture before ironing and overcasting...)

Next you'll need to sew along the top edge to attach the wasitband to the skirt. I sew two times really close together for extra strength as I know kids are tough on clothing!


Then you need to fold down the little flap that will be sticking up towards the skirt bodice fabric. And stitch down ontop of it.


You will end up with this. Can you see the stitching?

Time to make ruffles!!!!!
Take one piece of your ruffles fabric and fold in half shortways. Sew with the longest stitch setting you have along the serged/overcast edge. Do not tie off thread. Instead you'll need to loosen up the last stitch and pull it through the fabric as if you're going to undo the stitching. Only take one stitch out though. Then you'll need to pull on ONE thread and gently tug, sliding the fabric away from the direction you're pulling in.
Keep doing this, gently gathering up all the fabric. Usually I get it about halfway and then do the same on the other end of the fabric. After it's all cinched up together I lay it down ontop of the skirt bodice and see how it looks. If it's too short I will gently undo the ruffles by sliding them towards the end of the thread. You can arrange the ruffles however you wish at this point. Some people like them evenly spaced or varied. here I just 'went for it' and left it just enough to match up to the sides of the skirt bodice.

Ruffle!


Once you lay out the ruffle and match up the sides to the bodice, pin it in place. Then repeat with the other ruffles, slightly overlapping the top edge seam so it won't show after you stitch it down. Once you have them where you want them, Stitch them down. Go slow and remove all the pins! Sometimes they can hide under the ruffles!
You can now place your lace over the top edge of the ruffle that's on the top. It will hide all the stitching! :) Sew this down in place, going slowly as well, lace is delicate under a machine!

Next you'll want to sew up the very bottom of the bodice. This is the bottom edge. Just turn it over, fold it under, then again to hide the raw edges and sew it down in place.

Top Wasitband:
Flip it over so you're looking at the back. Fold the top edge down just overtop of the stitching where you attached it to the bodice. You want to fold the top over twice like you did with the bottom so you're encasing the raw edge. Sew this down.

You're also done! you just need to fold the whole thing in half so it will form a skirt, matching the short sides up, right sides (print sides) together. Sew from the bottom up. When you get to the bottom of the wasitband, stop. You'll want to insert the elastic with a safety pin attached to the end for ease of threading and then pull it out the other side. Sew the two elastic ends together and sew up the wasitband seam!

TADA!